
Hardie Plank Cladding Installation Guide: A Comprehensive Plan
This guide details connecting with others, sharing content, and securing accounts – essential for a seamless digital experience, as of November 27, 2025.
Hardie Plank cladding represents a popular and durable siding option for both residential and commercial buildings, offering a compelling alternative to traditional wood. Its composition, primarily fiber cement, delivers exceptional resistance to fire, pests, and weather damage, ensuring longevity and reduced maintenance. This guide provides a comprehensive walkthrough of the installation process, focusing on achieving a professional finish and optimal performance.
Understanding the benefits of connecting with communities and sharing experiences, much like platforms facilitate, is key. Proper installation, similar to securing online accounts, demands attention to detail and adherence to best practices. This ensures a lasting, protective, and aesthetically pleasing exterior for your structure, mirroring the value of a secure digital presence.

Tools and Materials Required
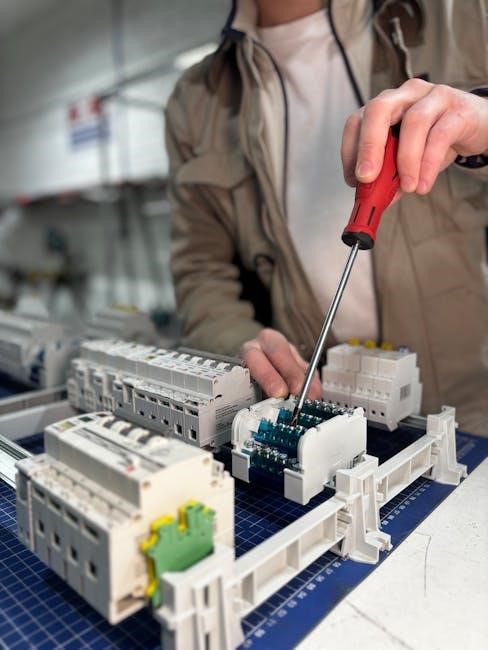
Successful Hardie Plank installation necessitates a curated collection of tools and materials, ensuring efficiency and precision. Essential hand tools include a measuring tape, utility knife, chalk line, speed square, and a hammer. Power tools vital for the job are a circular saw with a fiber cement blade, a drill/driver, and potentially a siding nailer for faster application.
Beyond the tools, specific materials are crucial: Hardie Plank siding itself, corrosion-resistant fasteners (nails or screws), flashing tape, house wrap (WRB), and exterior-grade caulk. Just as securing online accounts requires multiple layers of protection, a complete material list guarantees a weather-tight and durable cladding system.
Essential Hand Tools
For a solid start to your Hardie Plank project, several hand tools are indispensable. A high-quality measuring tape ensures accurate cuts and layout, while a utility knife is perfect for scoring and trimming. A chalk line creates straight, consistent guidelines for installation, mirroring the need for clear lines of communication.
A speed square aids in precise angle measurements, and a hammer is necessary for initial fastening. These tools, like the features on platforms connecting people, are foundational. Just as Facebook facilitates connections, these hand tools facilitate a secure and professional siding installation, ensuring a lasting result.
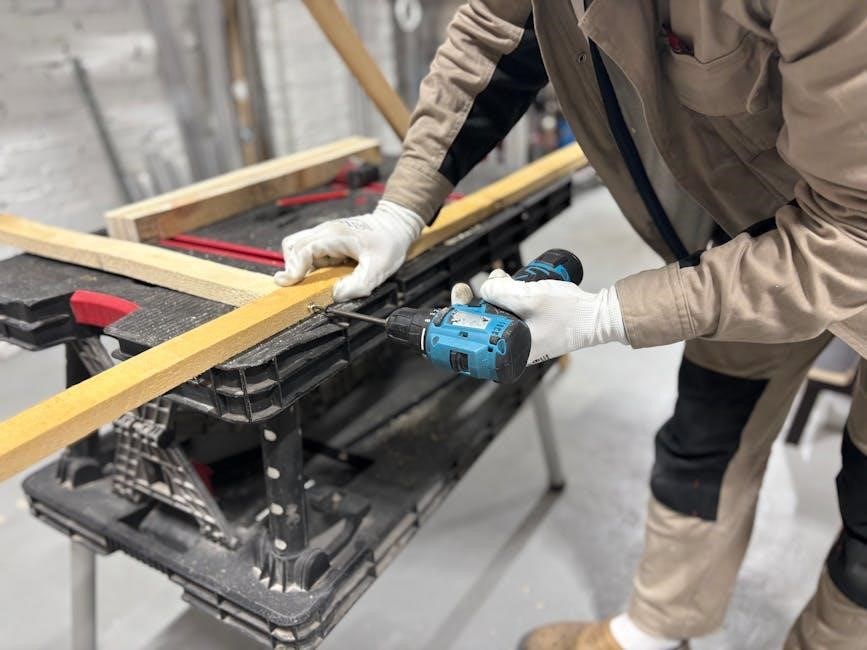
Power Tools for Efficient Installation
To expedite Hardie Plank installation, power tools are crucial. A circular saw, equipped with a fiber-cement blade, delivers clean, efficient cuts – similar to Facebook’s quick content sharing. A cordless drill/driver is essential for fastening, offering speed and convenience. A nail gun designed for fiber cement siding dramatically reduces installation time, mirroring the platform’s instant connection features.
Consider a miter saw for precise angle cuts, and a siding shear for quick, straight cuts. These tools, like Facebook’s tools for groups and watch, enhance productivity. Prioritize safety with appropriate personal protective equipment when operating any power tool.
Hardie Plank Specific Materials (Fasteners, Sealants, etc.)
Hardie Plank requires specialized materials for a lasting installation. Use corrosion-resistant, galvanized steel or stainless steel nails and screws – akin to Facebook’s secure login protocols. Specifically, Hardie recommends their own proprietary fasteners for optimal performance. A high-quality, fiber cement-compatible sealant is vital for sealing joints and around penetrations, preventing moisture intrusion, much like protecting your Facebook account;
Don’t substitute with standard construction adhesives. Flashing tape, designed for window and door openings, is also crucial. Proper material selection, like choosing a strong password, ensures durability and weather resistance.
Preparing the Substrate
Proper substrate preparation is paramount for a successful Hardie Plank installation, mirroring the importance of a secure Facebook profile. Begin by thoroughly inspecting the wall structure for any rot, damage, or inconsistencies – akin to checking for account vulnerabilities. Ensure the wall is structurally sound and can support the added weight of the cladding.
Next, install a weather-resistant barrier (WRB) to protect against moisture. Furring strips, installed vertically, create a rainscreen gap, promoting airflow and preventing water buildup, similar to Facebook’s multi-layered security features. These strips also provide a nailing surface for the Hardie Plank.
Inspecting the Wall Structure
A meticulous inspection of the wall structure is the foundational step, much like securing a Facebook account with a strong password. Carefully examine all framing members – studs, plates, and sheathing – for signs of rot, decay, or insect damage. Replace any compromised wood to ensure a solid and stable base for the Hardie Plank cladding.
Check for proper nail or screw spacing and ensure all fasteners are securely embedded. Address any existing irregularities, such as bowed or warped studs, before proceeding. A sound structure guarantees longevity and prevents future issues, mirroring Facebook’s commitment to user data protection.
Installing Weather-Resistant Barrier (WRB)

Applying a Weather-Resistant Barrier (WRB) is crucial, akin to Facebook’s two-factor authentication for account security. Overlap seams by at least six inches, ensuring complete coverage to prevent water intrusion. Securely fasten the WRB with appropriate staples or nails, maintaining consistent tension.
Pay close attention to openings around windows and doors, carefully flashing these areas to direct water away from the structure. A properly installed WRB safeguards the wall cavity from moisture damage, mirroring Facebook’s efforts to protect user information. Inspect for tears or punctures and seal them immediately for optimal performance.
Furring Strips: Purpose and Installation
Furring strips create a ventilated rainscreen, similar to Facebook’s community guidelines fostering open, yet protected, interaction. Install vertical furring strips, typically 1×3 lumber, over the WRB, spaced according to Hardie Plank specifications – usually 16 or 24 inches on center.
Secure furring strips with corrosion-resistant fasteners, ensuring they are plumb and consistently spaced. This creates a gap for airflow, preventing moisture buildup behind the cladding. Proper installation is vital for longevity, much like Facebook’s security measures protecting user data. Check local building codes for specific requirements.

Planning the Layout & Cutting Hardie Plank
Strategic layout planning, akin to Facebook’s algorithm connecting users, minimizes waste and ensures a visually appealing finish. Begin by calculating the number of planks needed, accounting for waste, similar to managing multiple Facebook accounts. Determine a staggered joint pattern for a more natural look and increased strength.
Accurately measure and mark cut lines, remembering Hardie Plank’s specific requirements. Use a scoring tool and snapping technique for straight cuts, or a power saw with a fiber-cement blade. Prioritize safety – wear dust protection! Precise cuts are crucial, mirroring Facebook’s precise targeting.
Determining Staggered Joint Patterns
Like connecting with diverse communities on Facebook, staggered joints enhance the overall strength and aesthetic appeal of your Hardie Plank installation. Avoid continuous vertical joints, which can compromise weather resistance and visual harmony. A common approach involves starting each subsequent course with a quarter-piece plank, creating a randomized, brick-like pattern.

Plan the pattern carefully, considering the dimensions of the planks and the wall’s overall size. This minimizes small cuts and waste, similar to efficiently managing content on a Facebook page. Staggering joints distributes stress and prevents unsightly linear weaknesses.
Accurate Measurement and Marking
Just as precise targeting is crucial on Facebook, accurate measurements are paramount for a professional Hardie Plank installation. Begin by meticulously measuring the wall’s dimensions, accounting for any irregularities or obstructions. Transfer these measurements onto the Hardie Plank, using a chalk line for straight, consistent markings.
Double-check all measurements before cutting, as errors can be costly and time-consuming. Mark cut lines clearly, indicating waste side to avoid confusion. Precise marking ensures proper alignment and minimizes gaps, mirroring the importance of clear communication within online communities.
Safe and Efficient Cutting Techniques (Scoring & Snapping, Power Saw)
Similar to navigating Facebook’s features, cutting Hardie Plank requires a strategic approach. For smaller cuts, scoring and snapping can be effective – use a utility knife and straight edge to create a deep score, then snap along the line. Always wear safety glasses!

For larger or more complex cuts, a power saw with a fiber-cement blade is recommended. Control dust effectively with a vacuum attachment. Prioritize safety by following the saw’s manual and wearing appropriate personal protective equipment. Clean cuts contribute to a professional finish, just as a well-maintained profile enhances your online presence.
Installing the First Course of Hardie Plank
Establishing a solid foundation, much like connecting with friends on Facebook, is crucial. Begin by establishing a perfectly level starting point using a chalk line – this dictates the alignment of all subsequent courses. Accurate measurement is key, ensuring a consistent reveal.
Use appropriate fasteners, spaced according to Hardie Plank’s specifications, and driven to the correct depth – avoid overdriving. Proper fastener spacing guarantees secure attachment and prevents issues later. This initial course sets the standard for the entire installation, mirroring the importance of a strong initial impression online.
Establishing a Level Starting Point
Just as Facebook connects you to your community, a level starting point connects your cladding to a structurally sound base. Begin by identifying the lowest point of the wall using a long level or a laser level. Extend a chalk line horizontally from this point, ensuring it’s perfectly level across the entire starting area.
This line serves as your guide for the first course of Hardie Plank. Any deviation from level here will compound throughout the installation, resulting in a visibly uneven finish. Double-check your measurements and adjust as needed – precision is paramount, similar to securing your online accounts.
Correct Fastener Spacing and Depth
Like Facebook’s security features protecting your information, proper fastening secures your Hardie Plank. Use corrosion-resistant nails or screws specifically designed for fiber cement siding. Follow the manufacturer’s recommended spacing – typically 12 inches on center – to ensure uniform support and prevent warping.
Crucially, drive fasteners to the correct depth; they should be flush with the plank surface without breaking the surface paper. Overdriving can compromise weather resistance, while underdriving leaves the plank vulnerable. Consistent depth, mirroring a secure password, is vital for long-term performance.
Subsequent Course Installation & Overlap
Building upon the first course, like connecting with friends on Facebook, subsequent rows require precision. Maintain a consistent reveal – the exposed portion of the plank – for a uniform appearance. This is achieved through careful alignment and consistent overlap.
Hardie Plank typically requires a minimum overlap of 1.5 inches on seams, mirroring Facebook’s layered security. This overlap acts as a crucial weather barrier, preventing water intrusion. Stagger the joints between courses, avoiding continuous vertical lines, much like diversifying your online connections for broader support.
Maintaining Consistent Reveal
Achieving a visually appealing Hardie Plank installation, similar to a well-curated Facebook profile, hinges on a consistent reveal. This refers to the uniform exposure of each plank’s face. Use spacers during installation to guarantee equal distances between planks, preventing noticeable variations.
Regularly check alignment with a level, correcting any discrepancies immediately. A consistent reveal isn’t merely aesthetic; it contributes to the cladding’s weather resistance, preventing gaps where moisture can penetrate. Like Facebook’s consistent interface, uniformity builds trust and quality.
Proper Overlap for Weather Protection
Just as Facebook prioritizes account security, Hardie Plank installation demands meticulous attention to weather protection through proper overlap; A minimum 1.5-inch side lap is crucial, ensuring water sheds effectively and doesn’t infiltrate the wall structure. This overlap acts as a shingle, directing moisture downwards and away from vulnerable areas.
Stagger vertical joints to prevent continuous pathways for water intrusion, mirroring Facebook’s layered security measures. Correct overlap, combined with appropriate flashing, creates a robust barrier against the elements, safeguarding your investment and home’s integrity.
Installing Hardie Plank Around Windows and Doors
Similar to Facebook connecting people, precise installation around windows and doors connects weather protection with aesthetic appeal. Accurate cutouts are paramount; measure twice, cut once, ensuring a snug, yet not overly tight, fit. Leave a consistent reveal – the exposed frame – for expansion and contraction.
Crucially, integrate flashing details above windows and doors. This diverts water away from the openings, preventing rot and damage, much like Facebook’s security features protect user data; Proper sealing with high-quality caulk completes the weather barrier, ensuring long-lasting performance and a professional finish.
Creating Accurate Cutouts
Just as Facebook allows precise targeting, accurate cutouts are vital for a professional Hardie Plank installation. Begin by carefully transferring window or door dimensions onto the Hardie Plank, adding a generous 1/8″ to 1/4″ for movement and a clean fit. Utilize a scoring and snapping method for straight cuts, or a fiber cement saw with a dust collection system for more complex shapes.
Always prioritize safety – wear appropriate eye and respiratory protection. Double-check measurements before cutting, mirroring Facebook’s verification processes. A precise cutout ensures a weather-tight seal and a visually appealing finish, preventing future issues.
Flashing Details for Waterproofing
Similar to Facebook’s security features protecting your data, proper flashing safeguards your home from water damage. Flashing is crucial around all windows and doors, acting as a primary defense against moisture intrusion. Install Z-flashing above windows and doors, extending at least an inch onto the Hardie Plank and the sheathing.
Ensure flashing overlaps correctly, creating a shingle-like effect to direct water outwards. Use high-quality, self-adhering flashing tape for a reliable seal. This meticulous detail, like a secure Facebook account, prevents long-term structural problems and maintains the integrity of your cladding system.

Finishing Touches & Sealing
Just as Facebook connects you to your network, sealing protects your Hardie Plank investment. After installation, caulk all joints and fastener heads with a high-quality, paintable sealant to prevent water penetration. This step mirrors securing your Facebook account with a strong password – essential for long-term protection.

Next, apply a 100% acrylic latex paint or a finish specifically designed for fiber cement siding. This enhances durability and aesthetic appeal. Remember, regular maintenance, like updating your Facebook profile, keeps everything looking its best. Proper sealing and finishing ensure years of beautiful, weather-resistant performance.
Caulking Joints and Fastener Heads
Similar to Facebook’s security measures, meticulous caulking is vital for a weatherproof Hardie Plank installation. Use a premium, paintable, elastomeric caulk specifically formulated for exterior use. Apply a consistent bead along all plank joints, ensuring complete coverage. This prevents moisture intrusion, mirroring Facebook’s protection of your personal data.
Carefully caulk around each fastener head, creating a watertight seal. Avoid over-caulking, as it can create a messy appearance. Smooth the caulk bead with a wet finger or a caulking tool for a professional finish. This diligent step safeguards against rot and extends the lifespan of your cladding, just as consistent security updates protect your Facebook account.
Painting or Finishing Hardie Plank
Much like customizing your Facebook profile, finishing Hardie Plank allows for personalized aesthetics and enhanced protection. Use a 100% acrylic latex paint designed for fiber cement siding. Priming is crucial for optimal adhesion and a uniform finish, similar to setting strong privacy settings.
Apply two coats of paint, following the manufacturer’s instructions regarding drying times. Lighter colors reflect heat, while darker shades absorb it – consider your climate. Ensure complete coverage, paying attention to edges and corners. A quality finish not only beautifies your home but also safeguards against the elements, mirroring Facebook’s constant evolution.